Blog

The Importance of Professional Tree Removal Services for a Safe and Beautiful Garden in Darwin

A garden can be a beautiful addition to any property, but sometimes trees can become a hindrance to its growth & maintenance. Overgrown trees can block sunlight, inhibit the growth of other plants, & pose a risk to the safety of the garden’s visitors. This is where professional tree removal services come in.

Expert Tree Removal Darwin services can help improve the health and appearance of your garden. They have a team of experienced tree removal specialists who are fully trained & equipped. By removing trees that are inhibiting the growth of your garden, you can create a safer & more visually appealing space.

Why DIY Tree Removal is Not Recommended for Your Garden

Attempting to remove a tree from your garden yourself may seem like a cost-effective solution. Without the proper equipment & knowledge, you could put yourself at risk as removing a tree requires careful planning to ensure that other plants and structures are not damaged in the process.

tree removal

Benefits of Professional Tree Felling Services for Your Garden

By hiring a professional tree felling service for your garden, you can ensure that the job is done safely and efficiently. Here are some of the benefits of choosing professional tree services in Darwin:

Experience: Expert tree lopping & removal companies have the necessary experience & knowledge to safely remove trees in a garden without causing damage to other plants or structures.

Specialized equipment: Professional tree removals have the specialized equipment needed to remove trees safely in a garden.

Cost-effective: Hiring a professional tree company can save you money in the long run by preventing property damage and injuries.

Time-saving: Professional tree service companies can complete the job in a fraction of the time it would take a DIYer, allowing your garden to get back to its natural beauty sooner.

Equipment Used in Professional Tree Felling for Your Garden

Professional tree felling teams use specialized equipment to ensure that the job is done safely and efficiently in your garden. Their equipment includes:

Chainsaws: To cut down trees and remove branches, carefully avoiding damage to other plants.

Ropes and harnesses: To climb trees and safely remove branches without harming other plants.

Cranes: To lift and remove large trees without disturbing other structures in the garden.

Stump grinders: To remove tree stumps without disturbing the surrounding soil or other plants.

Saving Time and Money with Professional Tree Removal Services for Your Garden

While DIY tree removal in your garden may seem like a cost-effective option, it can actually end up costing you more money in the long run. If you don’t have the necessary equipment or experience, you could end up damaging your garden or injuring yourself or others. This could result in expensive repairs and medical bills.

By hiring professional tree services for your garden, you can save time and money by avoiding costly mistakes. Professional tree removal companies have the experience and equipment needed to get the job done quickly and safely, allowing you to get back to enjoying your garden sooner.

Environmentally-Friendly Tree Removal for Your Garden

NSS Tree Services is committed to protecting the environment. That’s why they use environmentally-friendly practices in their tree removal services for your garden. They recycle and reuse as much of the tree as possible, reducing waste and minimizing the impact on the environment. By choosing their professional tree services for your garden, you can feel good about doing your part to protect the planet.

Leave Tree Removal to the Experts: Ensuring Safe and Environmentally-Friendly Services for Your Garden

Removing trees from your garden with the help of professional tree services like NSS Tree Services can ensure that the job is done safely. Their team of experts is trained & equipped to handle any tree removal and takes pride in providing personalized services to meet the unique needs of their clients. Contact them today for all your tree care services needs.

Top Tips For Tree Lopping in Your Orchid Garden

If you’re planning to plant an orchid tree in your garden, there are some essential insights you must know. One of those is how to keep your plants healthy, particularly the trees, and apply proper maintenance like tree lopping.

It’s important to choose the right tree. Ideally, you want a tree with rough bark that is groovy, giving the roots a good grip on it.

tree loping

1. Choose Your Tree Wisely

Orchid trees are some of the most interesting and versatile landscape plants. Their bright green leaves, colorful blooms, and sweet-smelling flowers add color to your yard and make them a unique addition to any garden.

They can also be a great centerpiece for your outdoor space and are easy to care for, making them a popular choice among homeowners. But, as with any plant, they need some help to thrive and look their best.

To keep your orchid tree happy, choose a location that provides enough light to encourage growth but not too much. Direct sunlight can burn an orchid and lead to wilted leaves or no blooms.

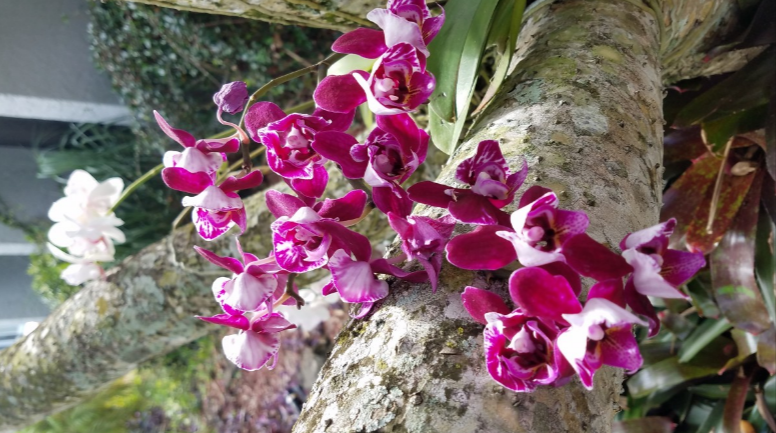
Choose a tree with a thick, horizontal trunk or branch that is thick enough to support the roots of your orchid. You want a tree that has bark with good texture, or what is commonly called “groovy” bark.

2. Don’t Be Afraid to do tree lopping

Whether you have a Phalaenopsis orchid, a Cattleya, or another type of tree, tree loping is essential for maintaining the health and vitality of your plant. Not only can you encourage the plant to grow bigger roots and blooms, but pruning helps prevent disease and fungus.

It is also an opportunity to remove any dead or dying roots. This can make the process of repotting less stressful for your orchid.

You can prune your tree while it is still in the flowering stage, or at any time of the year. Regardless of which method you choose, be sure to use sharp scissors and don’t cut the plant too aggressively. However, it is advisable to contact a certified arborist to ensure trees will be properly lopped.

Most types of orchids produce spikes as a flower structure, and once the plant has finished blooming, it needs to be trimmed back. This will encourage new flower spikes to appear in the future.

3. Make Sure Your Tree Gets Plenty of Sun

The sun plays a big role in the photosynthesis process that trees use to synthesize food from carbon dioxide and water. Without enough sun, your tree can be weakened and even killed.

As a result, it’s important to choose the right spot when planting your tree. For example, most fruit trees need full sun (at least 6 hours of sunlight a day) to produce fruits.

To get the best results, be sure to plan your tree’s location well in advance. Consider the direction of your home’s windows and where the sun will be during the day.

Once you’ve chosen the perfect spot, be sure to keep an eye on your tree’s progress in the first few months of its life. If it’s doing well, you can gradually increase the amount of sunlight it receives in small increments until it’s fully acclimated to its new location. This will give it the best chance to thrive and provide you with many years of beautiful orchids!

4. Don’t Be Afraid to Water

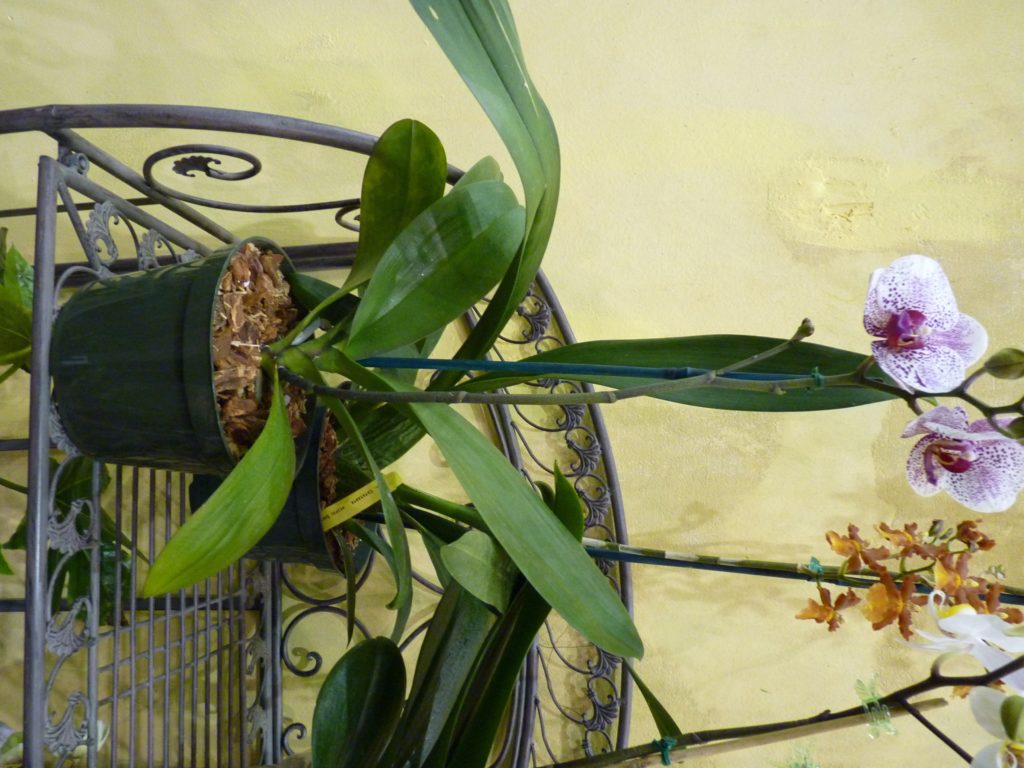
Many orchids are epiphytes, which means that they cling to tree branches rather than delving into the soil. This makes them ideal houseplants.

These plants are also hardy and do well in warm, stable climates – even in the deep south and coastal areas. However, some orchids require specific conditions to thrive, so it’s important to choose the right one for your garden and your space.

If you want to keep your plant happy when it is being removed from the orchid garden, it’s important to water it regularly. Different cultivars require different watering requirements, so be sure to research the proper care for your particular orchid to make sure you’re providing it with plenty of moisture.

Why Are My Orchid Leaves Turning Yellow?

Too much sun

orchid leaves turning yellow

The main cause of orchid leaves turning yellow is overwatering. This is not a good thing because it kills the plant from the roots up. Before you even realize that your orchid has become sick, the roots start to rot and turn black. The best way to save your plant from this condition is to place it in a well-ventilated area. This will allow the orchid more air flow and avoid bacterial or fungal infections.

Another common cause of orchid leaves turning yellow is a nutrient deficiency. After the plant absorbs all of the nutrients from the potting mix, it may need fertilizer. Buy a fertilizer that is formulated for orchids, and make sure to follow the instructions on the label. Because orchids are light feeders, they do not require as much fertilizer as many other plants, but they can benefit from regular fertilization.

Too much sunlight can also cause orchid leaves to turn yellow. If you are growing your orchid in direct sunlight, the bright light from the sun can burn the leaves, causing them to turn yellow or brown. It will also cause scorch marks and cracks on the leaves. It may be necessary to move your orchid to indirect sunlight for a few hours each day.

Too little water

If you want to keep orchids looking their best year-round, make sure you don’t overwater them. While orchids need a stable temperature, too much or too little water can damage the leaves and stunt growth. However, the good news is that yellowed leaves can be easily replaced with new ones, so you don’t need to worry about having to remove them. Just make sure that your orchid’s room has a thermostat that keeps the temperature from dropping below 60 degrees F, and that it’s away from any cold drafts. Fertilising your orchid is also important to ensure that it’s healthy, but be careful not to over-fertilize it.

If you do notice that your orchids’ leaves have turned yellow or black, it might be time to increase their water levels. You can do this by adding a few drops of water each time you water. Make sure that the watering level matches the type of orchid that you have.

Nutritional deficiency

Orchids can show signs of nutrient deficiency if they do not receive enough calcium and magnesium in their soil. The plants can also have brown or black leaf tips. If this is the case, you should take steps to fix the problem as quickly as possible. You can start by feeding the plant with Cal Mag solution. Apply it once a week for three weeks. After that, you can observe improvements in the leaves. Moreover, if you see that the calcium and magnesium levels are lower than normal, you may have to give them additional feedings to make them healthy.

Orchids can suffer from different kinds of diseases, including fungus and virus. These conditions are hard to detect and treat. The main symptoms of these diseases are different and may be confused with one another.

Pests or disease

If you notice the leaves of your orchids turning yellow, you must immediately identify the cause. A common culprit is a fungal or bacterial infection. A fungal infection will cause the leaves to turn yellow, and bacterial rot will cause the leaves to turn black. Fortunately, you can prevent the problem from spreading by using the proper treatment.

The first thing you must do is check your orchid’s water source. Tap water can have high levels of magnesium and calcium, which are harmful to orchids. The high levels of these minerals can cause the leaves to turn yellow. In addition, hard water can also be harmful to the plant’s ability to absorb micronutrients.

In addition to pests, other common orchid problems include bacterial and fungal diseases. Fungal diseases are typically caused by overwatering. To prevent bacterial infections, you must remove infected leaves before they wilt. You can also apply a fungicide if you suspect a bacterial infection.

Orchid Fertilizing Tips

Before you fertilize your orchids, it is important to follow the directions of the orchid fertilizer on the package. The manufacturer will usually tell you to mix one teaspoon of fertilizer per gallon of water. You can, however, cut this amount in half or a quarter. Instead, mix one-half to one-fourth of the fertilizer with each watering. Make sure to rinse the plants after each fertilizing to prevent any salt buildup.

orchid Fertilizer Dosage

The correct orchid fertilizer dosage will ensure the optimum growth of your plants. Many orchid fertilizers are made from fish protein, soy protein, hydrolyzed poultry, bone meal, and kelp extract. These plant nutrients contain potash, calcium, and other essential nutrients. The best way to use these products is to follow the instructions on the package. It is also important to remember that the fertilizer you choose should be sized to match the size of the pot in which you’re growing the plant.

The recommended dosage for orchid fertilizer varies from product to product. In general, the manufacturer’s instructions suggest adding one teaspoon per gallon of water. However, if you’re unsure about the exact dosage for your orchid, use half to a quarter of the recommended amount. Remember to rinse the plant thoroughly after every watering, as salt can build up on the leaves of your orchids.

orchid fertilizer

Mixing Your Orchid fertilizer

Using orchid fertilizer is a convenient, low-cost way to provide your orchid with the nutrients they need to thrive. It also helps to promote new growth and colorful blooms. Unlike regular fertilizer, orchid fertilizer expires after two months, making it an ideal solution for people who don’t have the time or the inclination to feed their plants regularly.

When you mix fertilizer for orchids, be sure to use a well-balanced blend. A high-quality, balanced formula is equally as effective at producing blooms as boosters. It also benefits all plants. There is an entire industry devoted to the sale of orchid food, but it’s important to avoid being overwhelmed by marketing hype. Despite the claims of the various brands, one nitrogen molecule is nearly identical to another.

Avoiding urea

Fertilizing your orchids is an important part of keeping them healthy. Most orchids need higher levels of nitrogen than other household plants. This is because their potting medium is usually made from tree bark, which contains bacteria that feed off nitrogen fertilizer. Avoid overfertilizing orchids by following the manufacturer’s instructions for fertilization.

Fertilizing orchids during the winter months can help them withstand cold weather and keep blooming longer. A winter fertilizer with a lower nitrogen content and a higher potassium content is ideal. During the winter season, you can also use less frequent fertilization to promote a healthy orchid.

If you’d like to use fertilizer on your orchids, make sure to look for one that doesn’t contain urea. Many commercial fertilizers have varying amounts of urea and other nitrogen-containing chemicals. Non-urea fertilizers should be half-strength and mixed with water before applying.

Mixing with rainwater or reverse osmosis (RO) water

Mixing with rainwater or reverse odized water for orchid fertilization is a good way to get a balanced mix of nutrients for your plants. The key is to avoid adding too much nitrogen, which can be bad for the roots. Fortunately, urea is easily broken down into ammonium, which orchid roots can easily absorb. Reverse osmosis water is also free of dissolved solids, which make it ideal for orchid fertilization.

It’s best to purchase orchid fertilizer specifically labeled for this purpose. Ideally, the product will have a balance of three major elements – carbon, phosphorus, and nitrogen – in its composition. The label should also give the percentage of each element.

Orchids Lifecycle

In this orchid lifecycle article, we will look at how orchids reproduce. In particular, we will discuss the life cycle of Phalaenopsis, Paphiopedilum, and Epiphytic orchids. We will also look at how flowers develop and how pollination is achieved. The orchid lifecycle can be confusing, but we will try to simplify the process as much as possible.

Phalaenopsis orchids

The Phalaenopsis orchid has a complicated lifecycle. The plant sends out several flower spikes in succession. Each spike bears one or two flowers. Before and after the bloom, the stems branch. The plant may need to be cut at the nodes or at the base of the stem to promote reblooming.

Phalaenopsis orchids require moderately bright light and consistent moisture to grow. They require weekly watering and a supplemental fertilizer. They are best grown in a container that is kept humid and cool. They bloom in the fall and the early spring. Phalaenopsis orchids live for years, depending on the care given to them.

Phalaenopsis orchids can survive in very humid conditions but need to be kept moist. They may require two weekly watering, especially during warm, dry weather. If they aren’t getting enough moisture, the leaves may yellow and wilt. They may also develop yellowing base leaves and root systems.

orchids lifecycle

Paphiopedilum

The Paphiopedilum orchid lifecycle consists of two main stages. First, it goes through the flower spike phase, which may last up to five years, but is usually shorter. Second, it goes through dormancy, which lasts for about two to six months. Finally, it produces small buds that will eventually open up into blooms.

Paphiopedilum orchids are not known for their pseudobulbs, so they need frequent watering, especially in summer. They need about an inch of water per week, but it’s important to avoid watering the roots too much. Also, they’re very temperature-sensitive, so you should keep their growing medium at around 60F or higher. Cool climate varieties need to be kept between 50F and 80F.

Interestingly, Paphiopedilum and Cypripedium orchids have very different floral traits. The former has shorter FLs, which are linked to the absence of pollinators, while the latter has longer flowering periods. The latter is more common in regions where weather conditions are more conducive for pollination.

Phalaenopsis sphegodes

The Phalaenopsis sphegodes lifecycle is relatively simple. The orchid prefers moderately warm temperatures and consistent moisture. The plants prefer a temperature range of 70 to 80 degrees Fahrenheit during the day and 60 to 65 degrees Fahrenheit at night. They also enjoy high humidity levels and benefit from a humidity level of 50% to 70%. They can be repotted at any time.

The Phalaenopsis sphegodes lifecycle consists of two main stages. First, it sends out a spike of flowers, which then turns brown. Sometimes the spike does not completely turn brown. If it does, cut it off just above the spike’s node on the stem to allow the plant to rebloom as a branch. However, if the spike is already completely brown, leave it alone so that the plant can collect its energy for next time.

The second stage is when the orchid blooms. This stage is referred to as pseudocopulation. The orchid mimics a female bee by releasing flowers during a period when male bees are actively seeking females. This means that the male bee is tricked into copulating with the flower and in this manner, it pollinates.

Epiphytic orchids

Epiphytic orchids are plants that live in a tree’s canopy. They may benefit from their mycorrhizal association to survive in the canopy under strong environmental stressors. However, many aspects of epiphyte lifecycles are unclear. For example, their mycorrhizal communities may depend on their host’s water and nutrient availability.

Most epiphyte orchids live in subtropical and tropical climates. They grow on thick branches of trees or perch on small twigs in the tree canopy. Their clinging roots utilize the water and organic material in the host plant’s bark and organic debris for nourishment. In addition, they require air movement to stay alive.

There are three basic types of epiphytes. They can grow on trees, on rocks, or on piles of decaying organic matter. These plants thrive in moist, humid environments.